Once again, the hardwood floor reveal is on hold another day. Our room and the baby’s room are done, but Tate’s is not and I’m leaning towards waiting and revealing all at the same time. In all honesty, I’m also a little nervous to share the finished product because they aren’t what I expected. They’re growing on me, and I think it will get better once we have rugs, beds, decor, and such in the rooms, but they still are different than what I planned on having! But I do apologize for the delay!
Anyone who personally knows me from my high school days, and even early college, knows that I have a long history of loving pink. It’s just so happy and bright and girly! I think it will always hold a special place in my heart. However, my life for the past three plus years has been consumed by blue. Blue husband, blue son, blue little boys I babysit. And don’t get me wrong, I love my husband, son, and adorable babysitting boys immensely and I even like the color blue… Especially the beachy colors. In fact, when it comes to decorating, blues are my go-to colors. But sometimes a girl just needs some pink, ya know?
Enter little miss baby bee. From day one of finding out I was pregnant I just felt like I was having a girl. I never really had a feeling either way with Tate, so it was a whole new experience for me. I was so convinced though that I told Corey before our gender appointment that if our doctor said it was a boy I might tell him he’s wrong! Either way I truly would have been happy and felt blessed, but I am thrilled we are having a little girl and that I can embrace girliness and pink again! :)
Okay, okay, let’s get to the point, right?
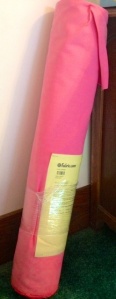
Well, remember that pink fabric I showed y’all awhile back?
It’s time to reveal that little much more overwhelming than I expected project!
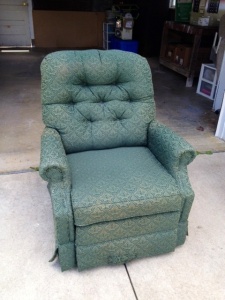
I decided I was going to use it to reupholster this chair for baby bee’s nursery:
Now, you may remember me mentioning I don’t sew. I’ve also never reupholstered a chair before. Probably not the best combination, but I decided it was worth a try. Especially when to get a chair even close to what I wanted from a store was at least $200. Yep,I’m gonna try the $70 version! :)
I got the material from fabric.com and used a coupon code I had googled for. With the coupon code it ended up being not quite $60 for ten yards since I wanted to be sure I had plenty of material. I just want to say I absolutely love it and think it was the perfect choice for the decor I’m planning to use! :)
Since I was more or less in the dark about this entire process I looked up a lot of tutorials. There is a ton of really useful information out there and I learned a ton. Of course, learning and following are not the same thing…
I started out with the best of intentions on doing it right. I started to take the chair apart and took a gazillion pictures of each part and labeled each piece. But then I got to the recovering part and realized I had no clue where to start. After staring at the frame for longer than I should have, I decided I just needed to dive in. My mantra was it doesn’t need to be perfect. Baby bee will love it no matter what. This is about doing a project for my little girl, not making it showroom ready.
So that’s what I did. I stapled. I got out my no-sew sewing glue. I even sewed a little bit (and it was really, really, really bad). It was a heck of a lot of work and totally wore me out. And I only have the top part done. BUT it was so worth it! I LOVE what I have so far.
Here’s some pictures I took of the process:
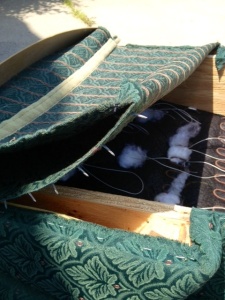
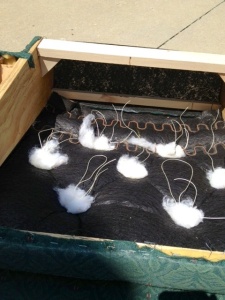
When I first started taking the chair apart. It was definitely a little scary! And let me tell you there was definitely no shortage of staples where this chair was concerned!
Like I said I have a gazillion pictures of various parts of the chair, but y’all don’t need to see all that.
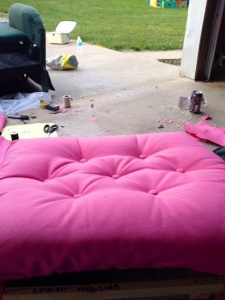
But here is after I had finished the tufting:
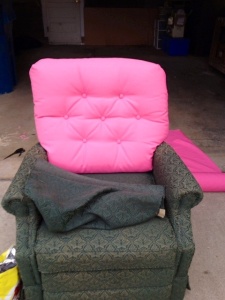
And the chair put back together after I stopped for the day:
You can tell it isn’t perfect. And if anyone who knows anything about upholstery ever saw it I’m sure they would be disgusted. But that’s okay. I truly love it so far! And I think it’ll be really cute when I finally get it done.
Oh and let me tell you it is C-O-M-F-Y! :) I foresee many nights in it in my future!
I’m hoping to get it finished up soon, maybe even this coming weekend. We will see how things go. I will be sure to share the final pictures and I’ll try to give you a bit more details of my backwards ways of gettin’ ‘er done in that post! :)
YAY PINK!!!
Pingback: Everything is Prettier in Pink! | Our Forever Home